Building a Custom System Monitor for My Home Server: Arduino-Powered I2C LCD Display
Related GitHub project: https://github.com/ledimestari/SystemMonitorLCD
Introduction
As part of my new home server build, I wanted a way to visually monitor key system metrics without needing to log in via SSH or keep a terminal open on my computer. I decided to create a custom solution using a Bash script that sends system information to an Arduino, which displays the data on a 1602 I2C LCD screen.
In this project, I’ll walk you through how I built a real-time system monitor that will eventually be installed in a custom 3D-printed mount for my server’s 5.25″ drive bay. I’m also planning to add RGB LED lights for alerts and status indicators. This project offers a simple yet powerful way to visualize your home server’s performance at a glance.
Project Overview
This setup consists of a Linux Bash script running on my home server that collects system metrics and sends them over a serial connection to an Arduino, which then displays the data on a 1602 I2C LCD screen. The goal is to keep an eye on crucial stats like CPU temperature, memory usage, and network speeds without relying on external monitoring services or logging into the server.
Key Features:
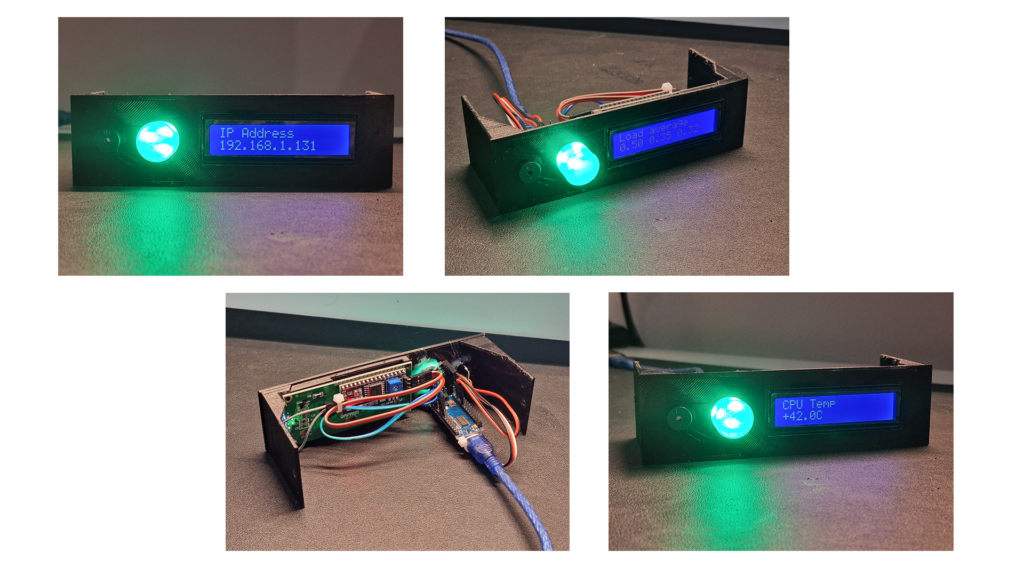
- Displays vital information such as uptime, disk usage, load averages, CPU temperature, and network speeds.
- Automatically turns the LCD off at night (between 22:00 and 08:00) to save power and prevent unnecessary light.
- Plans for a 3D-printed mount to integrate the LCD display into my server’s front panel.
- Future enhancement with RGB LED lights for real-time visual alerts (e.g., red for high CPU usage, green for normal status).
- Fully customizable and extendable, allowing for additional metrics or even remote monitoring in the future.
How the Script Works
The script is written in Bash and runs continuously, updating the LCD screen every 10 seconds with fresh system data.
- Serial Communication: The Bash script sends data over
/dev/ttyUSB0to the Arduino, which controls the 1602 LCD screen. - System Metrics Collection: The script collects various system metrics using common Linux tools such as
uptime,iostat,free, andpsto retrieve information about CPU load, disk usage, and more. - Day/Night Mode: The script turns off the LCD during the night hours to save power and avoid distractions, and it turns back on during the day.
- Future RGB Alert System: Eventually, I’ll add RGB LEDs that will change color based on system conditions. For example, high CPU usage might trigger red lights, while normal operations would be indicated by green.
Wiring the I2C 1602 LCD Screen to an Arduino
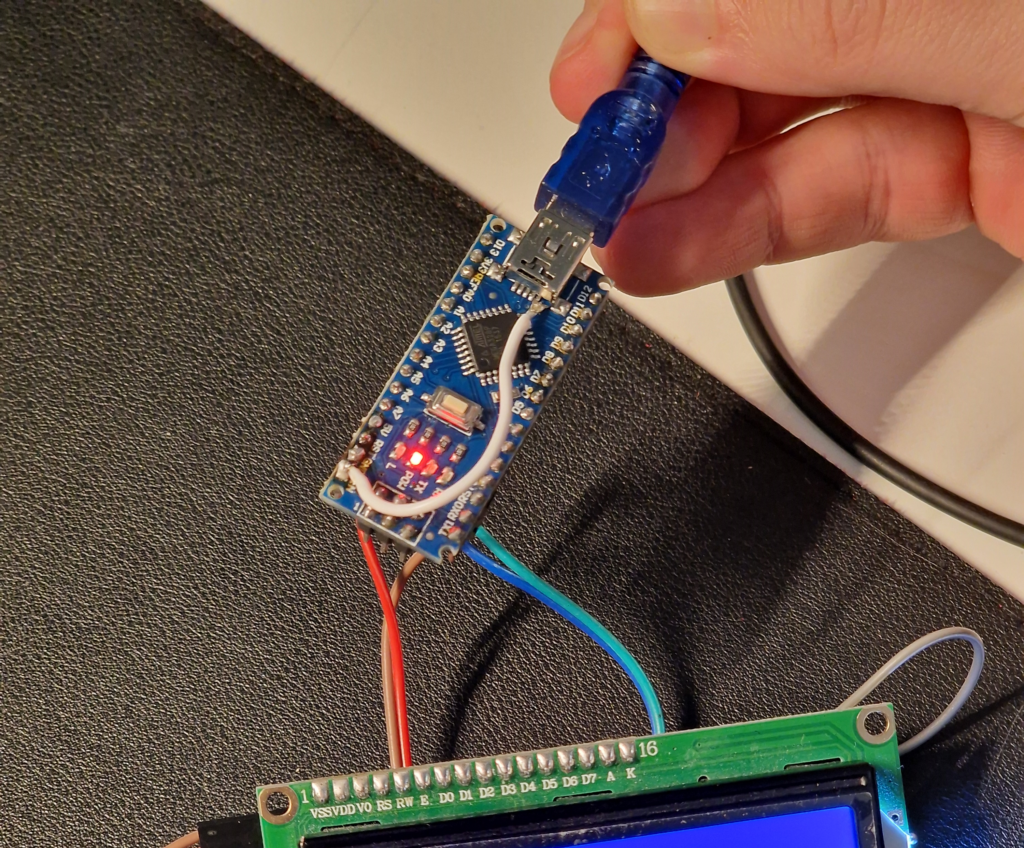
On my arduino I had to solder a silly jumper wire between the 5V leg of the USB port and VIN pin to provide enough voltage to the LCD screen but I’m pretty sure this particular arduino was just broken somehow.
Here’s how you can wire the I2C LCD screen to your Arduino if you’re interested in creating a similar project. This wiring allows the Arduino to receive data from the Linux server and display it on the screen.
Materials:
- Arduino (Uno, Nano, or any model with I2C support)
- I2C 1602 LCD screen
- Female-to-female jumper wires
- USB cable to connect the Arduino to the server
Wiring Diagram:
| LCD Pin | Arduino Pin |
|---|---|
| GND | GND |
| VCC | 5V |
| SDA | A4 |
| SCL | A5 |
This simple wiring allows the LCD to communicate with the Arduino using the I2C protocol, which minimizes the number of pins required for display control.
Future Plans: A 3D-Printed Mount and RGB LED Alerts
These are all done now 🙂
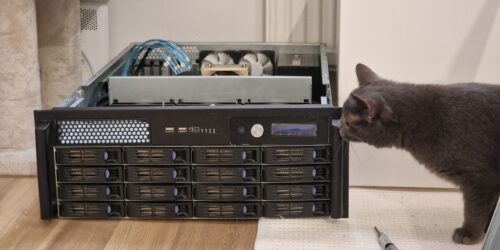
To integrate the display cleanly into my home server, I plan to 3D-print a custom mount for the LCD screen that will fit into the server’s 5.25″ drive bay. This will give the project a more polished and professional look, making it an attractive addition to my server rack.
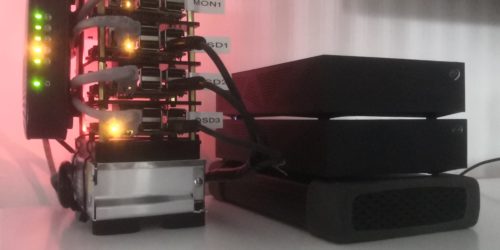
In addition to the LCD screen, I plan to add RGB LEDs that will act as visual indicators for system alerts. For example:
- Green LED: Everything is running smoothly.
- Yellow LED: Medium load, such as high disk usage or memory consumption.
- Red LED: Critical alert, like high CPU temperature or low disk space.
These visual indicators will allow me to glance at the server and immediately understand its current status without needing to read the display.
Update: 3D-print files, RGB lights and more!
So I have added pretty much all the things I said earlier.
3D-print files are here: https://www.thingiverse.com/thing:6762931 and the github page is updated too!